Voxnara

Preparing your workspace

Voxnara user guide

Learn the workspace.
Follow the workflow.

Practical, step-by-step guidance for creating speech, transcribing audio, connecting voices, and keeping your work organized.

Try “desktop audio”, “whisper”, “pronunciation”, or “export”.

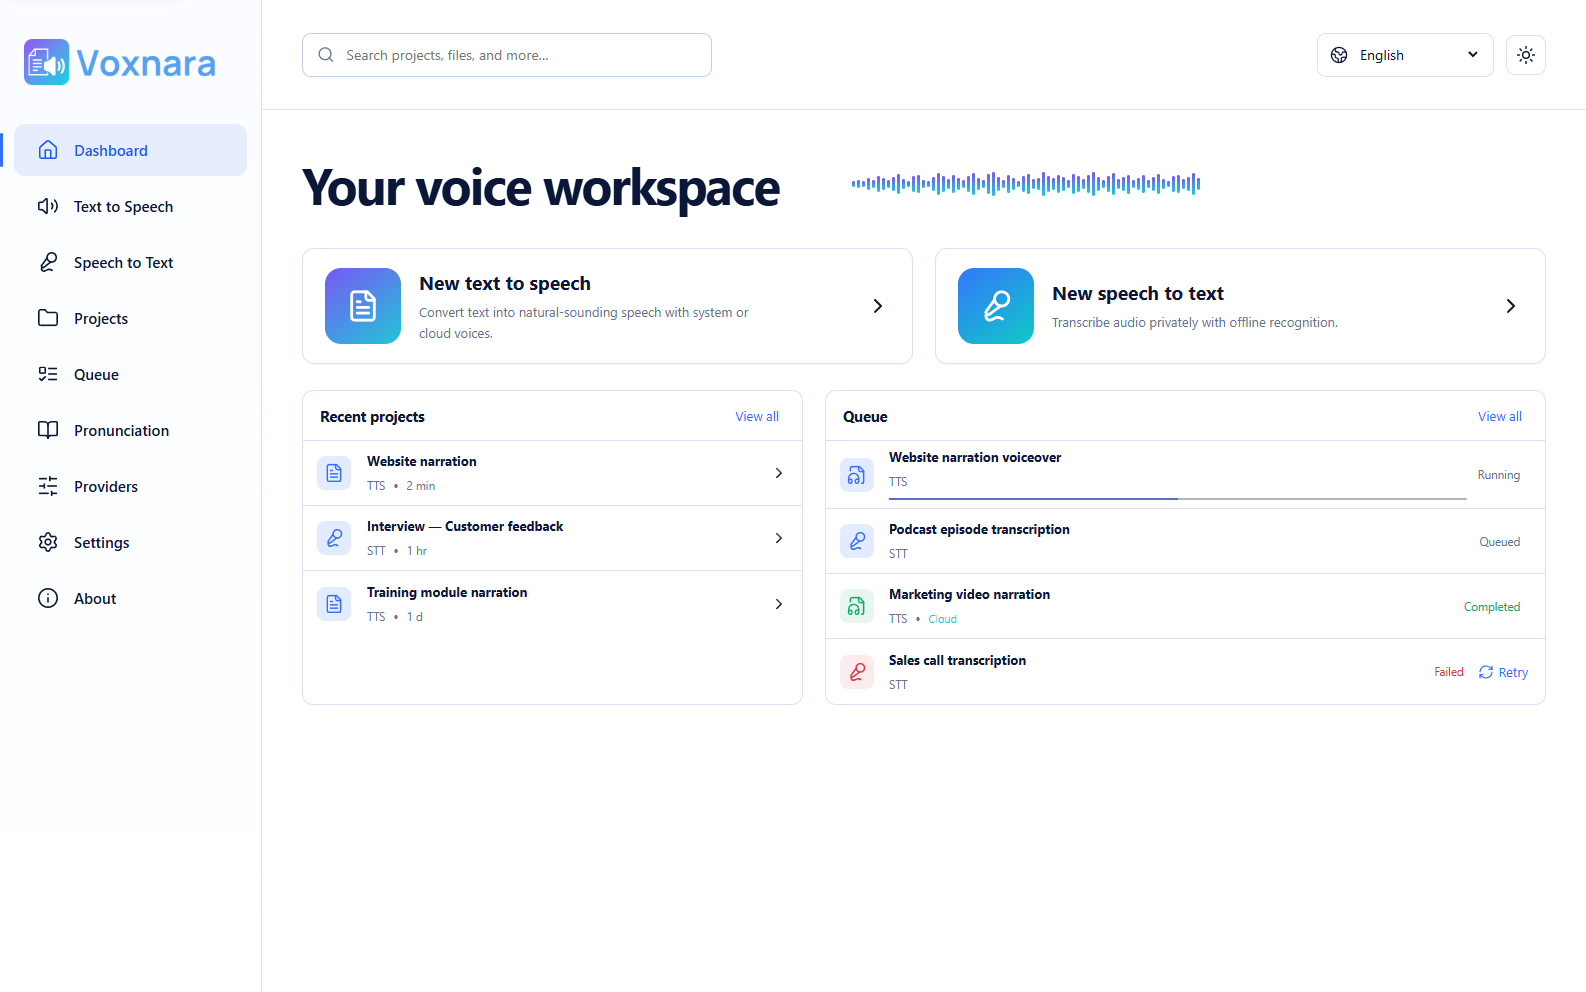
Voxnara dashboard
Voxnara dashboard with recent projects and queued jobs
04 focused chapters 11 practical guides
Start with the essentials

Quick start

From first launch
to finished work.

Start with the path that matches your goal. Each step links to the detailed instructions below.

  1. 01Set upInstall and activate Voxnara
  2. 02Create voiceWrite, direct, and export speech
  3. 03TranscribePrepare a model and capture audio
  4. 04Stay organizedManage projects, jobs, and settings

Guide library

Choose a chapter.
Complete the task.

Showing all 11 guides

01

Getting started

Browse Getting started walkthroughs.

01.01 First launchInstall and activate Voxnara

Complete the first launch, choose a language, and activate the application with the email used at checkout.

Follow these steps

  1. 01

    Download the installer for your operating system and complete the installation.

  2. 02

    Review the Software License Agreement, choose your preferred interface language, then select Accept and continue.

  3. 03

    Enter the purchase email and VOX license key exactly as shown on your order confirmation.

  4. 04

    After activation, use About → License to review the plan and activation status.

Open the full guide
01.02 WorkspaceFind your way around the dashboard

The dashboard is the quickest route to creation, transcription, recent projects, and queued work.

Follow these steps

  1. 01

    Choose Text to Speech to create voice from a written document.

  2. 02

    Choose Speech to Text to begin a new microphone, desktop-audio, or imported-audio transcript.

  3. 03

    Open Projects to return to saved Text to Speech or Speech to Text work.

  4. 04

    Open Queue to review processing progress, completed jobs, and retryable failures.

Open the full guide
02

Text to Speech

Browse Text to Speech walkthroughs.

02.01 CreateCreate a Text to Speech project

Use the canvas for your script and Engine for the document-wide voice and delivery defaults.

Follow these steps

  1. 01

    Open Text to Speech and select the title at the top of the page to rename the project.

  2. 02

    Enter the script in the document canvas. A project is saved after it contains text.

  3. 03

    In Engine, choose a connected voice, language, speed, pitch, loudness, and word-pause timing.

  4. 04

    Use the bottom Play control to synthesize and play the complete document.

Open the full guide
02.02 DirectGive a passage its own delivery

Selected text can use a different voice, delivery, emphasis, or effect without changing the document defaults.

Follow these steps

  1. 01

    Highlight a word, sentence, or passage in the canvas, then right-click the selection.

  2. 02

    Open Engine to set a selection-specific voice, speed, pitch, or loudness.

  3. 03

    Choose Emphasis → Reduced, Moderate, or Strong, or open Effects for soft voice, breathing, whisper, dynamic-range control, and timbre shaping.

  4. 04

    Choose Play in the context menu to synthesize and hear only the selected passage.

Open the full guide
02.03 Refine and exportControl pronunciation and export audio

Save reusable pronunciation rules, verify the finished document, and choose the delivery format you need.

Follow these steps

  1. 01

    Open Pronunciation and add the written word or phrase together with the replacement that should be spoken.

  2. 02

    Edit an existing rule when the spoken result needs adjustment. Enabled rules are reused during synthesis.

  3. 03

    Return to the document and play the affected passage or the full document to verify the result.

  4. 04

    Select Export Audio, then choose WAV, audio-only MP4, OGG, or WebM and save the file.
Open the full guide
03

Speech to Text

Browse Speech to Text walkthroughs.

03.01 PrepareDownload and choose a local model

Speech to Text requires an installed local recognition model before microphone, desktop, or file transcription can begin.

Follow these steps

  1. 01

    Open Provider connections and select the Speech to Text tab.

  2. 02

    Review each model’s size and expected performance, then download the model suited to your device.

  3. 03

    Wait for the download and verification to complete before opening Speech to Text.

  4. 04

    Select the installed model and the language spoken in the recording.

Open the full guide
03.02 CaptureRecord or import audio with live text

Build one continuous transcript from microphone speech, desktop playback, and imported audio.

Follow these steps

  1. 01

    Choose Microphone for your voice, Desktop audio for system playback, or Upload audio for a recording.

  2. 02

    Select the input device, language, local model, and expected number of speakers.

  3. 03

    Start recording. Interim words appear in the canvas while stable segments are committed during capture.

  4. 04

    Switch capture sources when needed; committed transcript text remains in the same project.

Open the full guide
03.03 ReviewReview speakers and save the transcript

Use local speaker labels to separate a conversation, then edit and save the result as a project.

Follow these steps

  1. 01

    Before capture, choose the expected speaker count from 1 to 10.

  2. 02

    After recording, let local diarization add generic speaker labels to the detected segments.

  3. 03

    Review the canvas, correct the transcript, and rename speaker labels where needed.

  4. 04

    Save the project, then reopen it later from Projects → Speech to Text.

Open the full guide
04

Manage the workspace

Browse Manage the workspace walkthroughs.

04.01 OrganizeManage projects and queued jobs

Projects keeps authored work separate by workflow, while Queue shows durable background processing.

Follow these steps

  1. 01

    Open Projects and switch between the Text to Speech and Speech to Text tabs.

  2. 02

    Select a project to continue editing, previewing, transcribing, or exporting it.

  3. 03

    Use Delete only when the confirmation dialog identifies the project you intend to remove.

  4. 04

    Open Queue to inspect active jobs, retry a failed operation, or review completed work.

Open the full guide
04.02 ConnectConnect a Text to Speech provider

Add only the cloud voice services you want to use and review their setup and pricing before connecting.

Follow these steps

  1. 01

    Open Provider connections and select a Text to Speech provider.

  2. 02

    Read its credential instructions, pricing link, and supported capabilities.

  3. 03

    Enter the required credentials and save the connection.

  4. 04

    Return to Text to Speech; the Engine lists only connected providers and the voices and languages they report.

Open the full guide
04.03 MaintainAdjust settings, update, and get help

Control workspace preferences in Settings and use About for license, update, and support actions.

Follow these steps

  1. 01

    Open Settings to change language, theme, recording behavior, retention, storage, and application data preferences.

  2. 02

    Open About → Update to check for and install an available application release.

  3. 03

    Open About → License to review the active plan or deactivate this installation.

  4. 04

    Open About → Help for WhatsApp Support, User Guide, and Feedback.

Open the full guide

Need another answer?

Keep learning.
Or talk to a person.

Browse concise answers in the FAQ, or send support the page, action, and message you see.